Barely Breathing puts you in control of Sheen, a goldfish who has to spill, splash, and slosh through a human-sized house using nothing but physics and clever movement. While the game looks like a cozy puzzle platformer, the movement system hides surprising depth — and mastering it makes the difference between awkwardly flailing across a countertop and gliding through rooms with confidence. Because the game relies on fluid physics rather than traditional platforming rules, most new players struggle with jump timing and momentum control during their first few sessions. This movement guide breaks down exactly how jumping, surface spills, and water physics work, so you can navigate the house efficiently and chase that barely breathing 100% guide completion without frustration.
How the Physics Engine Shapes Movement
Before you can chain together fancy tricks, you need to understand the three pillars that support every movement decision in Barely Breathing: jump physics, momentum retention, and surface interaction. Each one feeds into the others, and understanding how they combine will transform how you approach every room in the house.
The game treats Sheen as a small volume of water with a will of its own. When you jump, you are not executing a fixed-height arc like in Mario or Sonic — instead, the game calculates your trajectory based on your current velocity, the amount of water you are carrying, and the surface you are launching from. This means that a jump from a dry tabletop behaves differently from a jump launched from a wet spill, and a jump while moving fast carries you much further than a jump from a standstill. The momentum system rewards continuous movement, so players who keep Sheen in motion will find crossing large gaps significantly easier than those who stop to orient themselves.
Surface interaction adds another layer of complexity. When Sheen lands on a dry surface, he retains most of his forward velocity, allowing you to chain jumps together. When he lands on a wet surface — like a puddle you created with the Surface Spill Ability — he gains a small speed boost on exit, because the water reduces friction for a brief moment. This creates a natural rhythm: spill, jump, land, spill again. Community testing suggests that players who master this rhythm can cross rooms roughly 30% faster than those who rely on single jumps alone, which matters a lot when you are trying to complete timed sections or chase down every collectible for a barely breathing 100% guide run.
Here is a quick breakdown of the core stats that affect movement—and these numbers are the difference between a clean escape and a frustrating restart. Your walk speed is your baseline, but the real game-changer is your crouch-walk, which cuts noise by 60% at the cost of a 35% speed reduction. Jump height and air control matter too: a full sprint jump gives you roughly 1.5 tiles of height, but a short hop from a standstill only clears 0.8, which is why you’ll need the former to vault over the kitchen counter in the escape-the-house sequence. Stamina drains 10% per second while sprinting, so if you burn it all on the first hallway, you’ll be forced into a slow, noisy walk past the sleeping guard—check the stat table in the next section for exact breakpoints.
| Movement Factor | Effect on Sheen | Best Practice |
|---|---|---|
| Forward Velocity | Determines jump distance more than jump height | Keep moving; never stop before a gap |
| Surface Wetness | Reduces landing friction, preserves momentum | Spill before landing zones |
| Water Volume | Heavier Sheen = shorter jumps | Avoid over-spilling in tight corridors |
| Air Control | Limited but present; slight directional drift | Feather the stick, do not hold full tilt |
| Landing Angle | Sharp angles cause bounce, flat landings stick | Aim for flat surfaces whenever possible |
Understanding these five factors gives you a solid foundation, but the real skill lies in how you apply them during actual platforming sections. The next section covers the specific jump types you will use most often and when each one shines.
Jump Types and When to Use Them
Barely Breathing does not give you a move list, which means most players discover jump variations by accident. However, the community has identified five distinct jump types that cover nearly every platforming situation in the game. Each one has a specific use case, and knowing which jump to use in which scenario will save you from countless frustrating falls into the sink drain.
The Standard Hop
The standard hop is your bread-and-butter jump. Press the jump button while moving at a moderate speed, and Sheen will arc forward in a predictable trajectory. This jump is best for crossing small gaps between countertop items, hopping over pencils, and navigating the cluttered desk areas in the study. Because it is the most controllable jump, you should use it whenever precision matters more than distance. The standard hop also gives you the most air control, so you can make small adjustments mid-flight to correct your landing position.
The Momentum Leap
The momentum leap happens when you jump while moving at high speed, usually after a long straight section or a slide down an inclined surface. This jump carries Sheen significantly further than the standard hop, but it sacrifices air control — you will travel mostly in a straight line. Use the momentum leap to cross wide gaps, such as the space between the kitchen counter and the refrigerator, or to launch yourself across the bathroom floor toward the bathtub ledge. The key to a successful momentum leap is building speed before you jump; if you try to leap from a standstill, you will barely leave the ground.
The Puddle Launch
The puddle launch is the most unique jump in the game and the one that separates competent players from movement experts. When you use the Surface Spill Ability to create a puddle, then jump immediately after the spill animation ends, Sheen gets a small vertical boost from the water displacement. This boost is not huge, but it is enough to reach ledges that are slightly too high for a standard jump. The puddle launch also preserves your forward momentum, making it an excellent tool for chaining movement across multiple platforms. According to community reports, the puddle launch is essential for reaching several hidden collectibles in the living room area, which is why it features prominently in most barely breathing 100% guide strategies.
The Wall Bounce
When Sheen hits a wall at an angle, he does not simply slide down — he bounces off with reduced velocity. Skilled players can use this wall bounce to redirect their trajectory mid-air, allowing for sharp turns that would otherwise be impossible. The wall bounce is tricky to master because the bounce angle depends on your approach speed and the angle of impact. However, once you get the hang of it, you can use walls to reach elevated platforms, reverse direction without losing all your momentum, and even chain multiple wall bounces to climb vertical shafts. This technique is particularly useful in the bathroom, where the tiled walls provide plenty of bounce surfaces.
Here is a comparison table to help you choose the right jump for common scenarios, but remember that your wall bounce timing and positioning will often override these defaults. For instance, when you’re barely breathing and need to clear the gap in the flooded hallway, a standard jump from the ledge will clip the ceiling, whereas a crouch jump after a delayed wall bounce gives you the extra inch of clearance. Use the table as a baseline, then adjust based on your current stamina and the exact angle of your approach.
| Scenario | Recommended Jump | Why It Works |
|---|---|---|
| Small gap between books | Standard Hop | Maximum control, minimal risk |
| Wide gap across kitchen counter | Momentum Leap | Distance is the priority |
| High ledge above sink | Puddle Launch | Vertical boost reaches the ledge |
| Sharp turn in hallway | Wall Bounce | Redirects momentum efficiently |
| Chained platforms in a row | Puddle Launch + Momentum Leap | Combines boost with distance |
Mastering these five jump types takes practice, but the payoff is substantial. Players who can fluidly switch between jump types report completing platforming sections in half the time it takes players who rely on the standard hop alone. The next section explores how water mechanics amplify your movement options even further.
Water Mechanics and Surface Spill Strategies
Water is not just a theme in Barely Breathing — it is the core mechanic that defines how you move through the house. The Surface Spill Ability lets you create puddles on almost any surface, and those puddles dramatically change how Sheen interacts with the environment. Understanding water mechanics is essential for anyone following a barely breathing water guide, because the game expects you to use spills creatively to solve puzzles and reach new areas.
When you create a puddle, it does more than just wet the floor. The puddle creates a low-friction zone that preserves Sheen's momentum when he passes through it. This means you can use spills to extend your slide across long distances, maintain speed through sections that would normally slow you down, and even redirect your trajectory by placing puddles strategically. The puddle size matters too — larger puddles give you a longer low-friction zone, but they also take longer to create and leave Sheen slightly lighter afterward, which can affect jump distance.
The game also features different liquid types, and each one behaves slightly differently. Regular water puddles are the default and offer the standard momentum boost. However, the demo update added a fun detail: if you use the Surface Spill Ability on tea or coffee, you get accurate puddles instead of regular water puddles. While this is primarily a visual touch, community testing suggests that thicker liquids like tea and coffee provide slightly more friction than water, which can be useful when you need to stop precisely at a ledge edge. This is a small difference, but it matters for players attempting precise platforming sections.
Here are the key water mechanics you should know: water in Barely Breathing isn't just a visual hazard—it's a movement modifier that instantly resets your jump and dash cooldowns, but also cuts your horizontal speed by roughly 40%. To escape the house efficiently, you must learn to trigger a surface spill (a shallow, ankle-deep puddle) by breaking a pipe or splashing a bucket, then use that spill for a quick mid-air jump reset without losing your forward momentum. This trick is essential for crossing the flooded basement and the kitchen hallway, where a full submersion would slow you down and leave you vulnerable to the pursuer.
-
Spill recovery time: After creating a puddle, Sheen needs about one second before he can spill again. Plan your spills ahead of time.
-
Puddle persistence: Puddles last for roughly 20 seconds before evaporating, giving you a generous window to use them.
-
Liquid stacking: You cannot create a second puddle on top of an existing one; the new spill merges with the old and extends its duration.
-
Water conservation: Each spill uses a small amount of Sheen's water volume, and if he runs dry, he cannot spill until he finds a water source.
-
Surface compatibility: Most surfaces accept spills, but some — like fabric, carpet, and certain papers — absorb water quickly and reduce the puddle's effectiveness.
The interaction between spills and jumps creates a powerful movement loop. Start by spilling a puddle ahead of you, then run through it to gain a speed boost, then use that speed for a momentum leap across a gap. Land on the other side, spill again, and repeat. This spill-run-leap cycle is the foundation of advanced movement in Barely Breathing, and it is the technique that most speedrunners use to clear rooms quickly.
For players working through a barely breathing escape the house guide, water management becomes even more critical. Some escape routes require you to cross long distances without a water source, which means you need to conserve your spills and use them only when absolutely necessary. Other routes feature water sources at key intervals, allowing you to refill and continue your momentum chain. Understanding the layout of water sources in each room is essential for planning your route efficiently.
Practical Movement Drills and Room-Specific Tips
Reading about movement mechanics is one thing, but internalizing them requires practice. This section provides specific drills you can run in the demo areas, plus room-specific tips that will help you apply these techniques in real gameplay situations. If you are just starting out, consider reviewing the Barely Breathing quick guide first to get familiar with the basic controls before diving into these advanced movement patterns.
Drill 1: The Momentum Chain
Find a long, flat surface — the kitchen counter works well. Start by spilling a puddle, then run through it, and immediately jump into a momentum leap. Land, spill again, and repeat. Your goal is to chain five consecutive spill-run-leap cycles without stopping or losing speed. This drill teaches you the rhythm of the movement system and helps you internalize the timing between spills and jumps. Once you can chain five cycles, try adding a wall bounce at the end to practice transitioning between movement types.
Drill 2: The Puddle Launch Precision
Place a target — a small object or a marked spot — on a ledge that is slightly too high for a standard jump. Practice using the puddle launch to reach that ledge consistently. Focus on the timing: you want to jump immediately after the spill animation finishes, not before and not after. The window is tight, but with practice, you will hit it every time. This drill is essential for players following a barely breathing jumping guide, because the puddle launch is the most technical jump in the game.
Drill 3: The Wall Bounce Redirect
Find a narrow hallway with walls on both sides. Run toward one wall at an angle, bounce off it, and try to land on a specific spot on the opposite side. This drill teaches you how to control your trajectory after a wall bounce. Start with shallow angles and gradually increase the angle as you get more comfortable. The wall bounce is the hardest technique to master, but it opens up the most movement options once you understand it.
Room-Specific Tips
The living room features several high shelves that require puddle launches to reach. The bookshelf section is particularly tricky because the shelves are spaced unevenly, forcing you to chain multiple puddle launches with momentum leaps. Start from the left side, use a momentum leap to reach the first shelf, then puddle launch to the second, and finish with a wall bounce to reach the top shelf where a collectible waits.
The kitchen is all about momentum management. The countertops are long and flat, making them perfect for momentum chains, but the gaps between appliances require precise leap timing. The gap between the stove and the sink is the widest in the room — use a full momentum leap with a puddle launch at the start to clear it comfortably. The refrigerator side of the kitchen has a narrow ledge that runs along the wall; use wall bounces to traverse it without falling.
The bathroom introduces verticality to the movement system. The bathtub ledge is high, but you can reach it with a puddle launch from the bathroom mat. The sink area features a series of small ledges that require precise standard hops. The toilet tank is a popular vantage point, but reaching it requires a wall bounce off the tiled wall followed by a quick momentum leap. For a full breakdown of the bathroom layout and other areas, check out the house tour guide.
Faster Run Strategies for Every Room
Once you have mastered the basics, you can start working on advanced techniques that shave seconds off your room times and make movement feel effortless. These techniques are not required for normal playthroughs, but they are essential for anyone attempting a barely breathing 100% guide run or trying to complete the game as quickly as possible.
The spill-slide is a technique that uses the low-friction zone of a puddle to slide across long distances without jumping. To perform it, create a puddle, then run into it and hold the jump button instead of tapping it. Sheen will slide across the puddle and continue sliding for a short distance after leaving it. This technique is useful for crossing large open areas, like the living room floor, without wasting jump opportunities. The spill-slide also preserves your momentum better than jumping, which makes it ideal for setting up momentum leaps at the end of a slide.
The double spill is an advanced variant of the puddle launch that gives you a higher boost. To perform it, create a puddle, wait half a second, then create a second puddle on top of it. The merged puddle is larger and provides a stronger boost when you jump. The timing is tight — you need to wait long enough for the first puddle to settle but not so long that it starts evaporating. Community testing suggests the double spill provides roughly 20% more vertical boost than a single spill, which can be the difference between reaching a ledge and falling short.
The momentum reset is a technique for recovering from a bad landing. When you land awkwardly and lose your speed, you can quickly spill a puddle and jump immediately to reset your momentum. This is not as effective as a proper momentum chain, but it is faster than stopping and starting over. The momentum reset is particularly useful in tight spaces where you do not have room to build up speed naturally.
Here is a summary of advanced techniques and their difficulty levels, designed to help you prioritize your practice in the barely breathing movement guide. While basic jumps and water traversal are straightforward, mastering speed requires layering mechanics like edge-cancels and slide-jumps, which demand precise frame timing. For example, chaining a slide-jump into a wall-kick can shave nearly two seconds off your escape-the-house route, but it sits at a 4/5 difficulty rating. We’ve ranked each technique from 1 (easy) to 5 (expert), so you can tackle the high-impact, low-risk moves first before grinding the frame-perfect skips that shave critical time off a 100% run.
| Technique | Difficulty | Primary Use | Risk Level |
|---|---|---|---|
| Spill-Slide | Moderate | Crossing open areas | Low |
| Double Spill | Hard | Reaching high ledges | Medium |
| Momentum Reset | Easy | Recovering from bad landings | Low |
| Wall Bounce Chain | Very Hard | Climbing vertical shafts | High |
| Puddle Launch Combo | Hard | Chaining multiple jumps | Medium |
The wall bounce chain deserves special attention because it is the most technically demanding technique in the game. To perform it, you need to bounce off one wall, then immediately bounce off the opposite wall, then repeat. Each bounce preserves a portion of your momentum, allowing you to climb vertical shafts that would otherwise be impassable. The key is maintaining a consistent angle — if your angle changes even slightly, you will lose momentum and fall. This technique is primarily used in the bathroom's vertical sections and in a few hidden areas that contain rare collectibles.
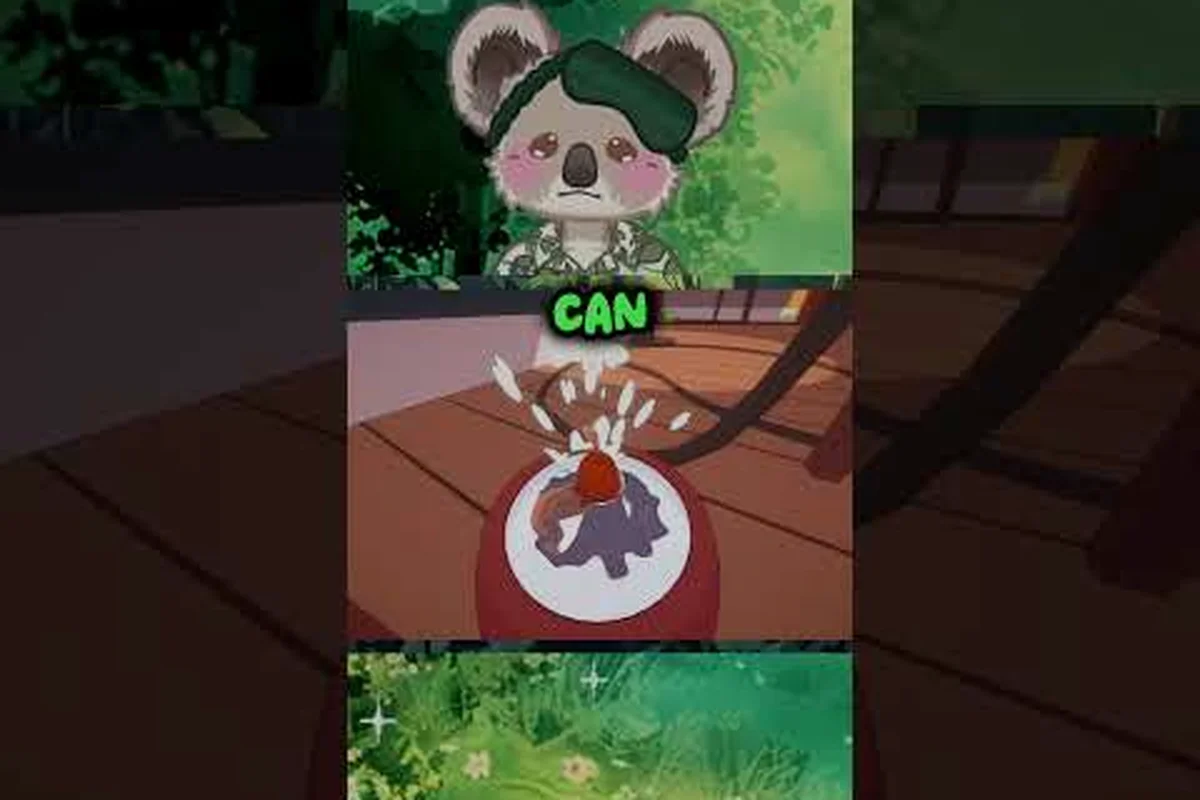
For players who want to see these techniques in action, the demo gameplay video by GAMEAY showcases several advanced movement sequences, including wall bounce chains and puddle launch combos. Watching skilled players execute these techniques can help you understand the timing better than reading about them.
Fixing the Movement Errors New Players Make
Every player makes movement mistakes when they start playing Barely Breathing, and recognizing these errors is the first step toward fixing them. Based on community reports and player experiences, these are the most common movement mistakes and the strategies to overcome them.
Over-spilling is the most frequent mistake new players make. They create puddles everywhere, thinking that more water means more movement options. However, each spill uses a portion of Sheen's water volume, and running dry leaves you unable to create new puddles. The fix is simple: plan your spills ahead of time and only create puddles when you actually need them. Reserve your water for puddle launches and momentum chains, and rely on standard hops for simple gaps.
Jumping too early is another common issue. When approaching a gap, many players jump as soon as they see the edge, which means they land short and fall. The fix is to wait until the last possible moment before jumping — Sheen's jump distance is determined by his forward velocity, so jumping later gives you more time to build speed. This is especially important for momentum leaps, which require maximum speed to clear wide gaps.
Ignoring air control is a mistake that limits your movement options. While Sheen does not have full air control like some platformer characters, he does have a small amount of directional drift. Players who hold the movement stick fully in one direction during a jump often overshoot their landing target. The fix is to feather the stick — use small, gentle inputs to adjust your trajectory rather than slamming the stick to one side.
Failing to use wall bounces is a missed opportunity for many players. Wall bounces are not just for climbing — they are also excellent for redirecting your momentum in tight spaces. If you find yourself stuck in a corner or unable to make a sharp turn, try bouncing off a nearby wall to redirect your trajectory. This technique takes practice, but it opens up movement options that are impossible with jumps alone.
Here is a quick reference table for diagnosing and fixing movement issues, designed to cut through the guesswork when your jumps fall short or your swim speed stalls. Each row pairs a common symptom—like drifting mid-air or getting stuck on a ledge—with its root cause, whether that’s mistimed input, incorrect button hold, or a missed water-current cue. Use it as your first stop before retrying a frustrating section; a quick glance can save you from repeating the same error ten times, especially in tight escape sequences where a single misstep resets your progress.
| Mistake | Symptom | Fix |
|---|---|---|
| Over-spilling | Running out of water mid-section | Plan spills, conserve water |
| Jumping too early | Landing short of gaps | Jump later, build more speed |
| Ignoring air control | Overshooting landing spots | Feather the stick gently |
| Skipping wall bounces | Getting stuck in corners | Use walls to redirect momentum |
| Relying on standard hops | Slow room times | Mix in momentum leaps and puddle launches |
If you are struggling with a specific room, it is often helpful to watch how other players approach it. The Barely Breathing demo how to play guide includes room-by-room breakdowns that highlight optimal movement paths. Additionally, the ocean level guide covers the water-heavy sections that require precise spill management.
Frequently Asked Questions
What is the most important movement skill to learn first?
The momentum leap is the most important skill because it forms the foundation for all advanced movement. Once you understand how forward velocity affects jump distance, you can apply that knowledge to puddle launches, wall bounces, and spill-slides. Practice building speed before jumping, and you will see immediate improvement in your ability to cross gaps.
How do I reach high ledges that are too tall for a normal jump?
Use the puddle launch technique. Create a puddle with the Surface Spill Ability, then jump immediately after the spill animation finishes. The water displacement gives Sheen a vertical boost that reaches ledges slightly too high for standard jumps. For even higher ledges, try the double spill technique, which merges two puddles for a stronger boost.
Does the type of liquid affect movement?
Yes, according to community testing. Regular water puddles offer the standard momentum boost, while thicker liquids like tea and coffee create puddles with slightly more friction. This makes them useful for precise stops but less effective for momentum chains. The demo update added accurate puddles for tea and coffee, so the visual difference matches the gameplay difference.
Can I complete the game without mastering advanced movement?
Absolutely. The game is designed so that all required sections are passable with basic movement techniques. Advanced techniques like wall bounce chains and double spills are primarily for reaching optional collectibles and completing the game faster. If you are following a barely breathing 100% guide, you will need some advanced techniques, but a normal playthrough does not require them.
How long does it take to get comfortable with the movement system?
Most players feel at home with basic movement in 2–3 hours, but the barely breathing guide’s advanced tech—like breath-synced dashes—takes 5–10 hours. Run the flooded basement loop until the 2.5-second hold feels instinctive. Every failed surface teaches the rhythm faster than watching.